- POS
- POS Orders
- Refunds & Exchanges
POS Refunds and Pickup Order Exchanges
You have the ability to execute refunds and exchanges on pickup orders through the order refund tools in the POS.
POS Refunds: Learn how to refund an order on the POS. Learn More >
POS Exchanges: Learn how to exchange items for a pickup order. Learn More >
FAQs: Review frequently asked questions regarding POS Refunds and Exchanges: Learn More >
POS Refunds
Refunding a split tender order? Check out our split tender refund documentation.
To process a refund in the POS:
1. Open the POS application.
2. From the main menu (3 bar icon in the upper left of the screen) select Order Manager.
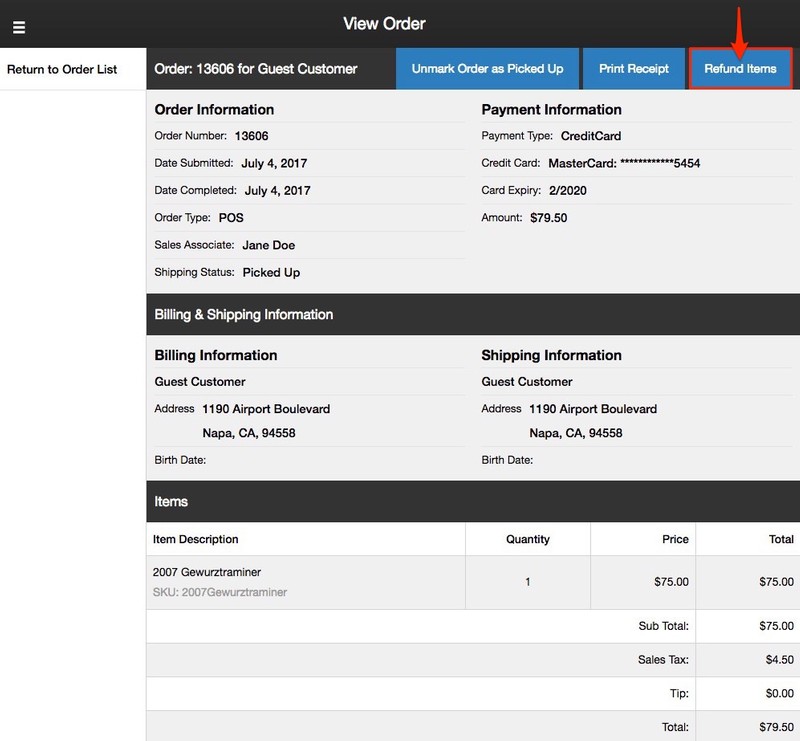
3. From the order list, select the order you wish to refund.
4. Click the Refund Items button.
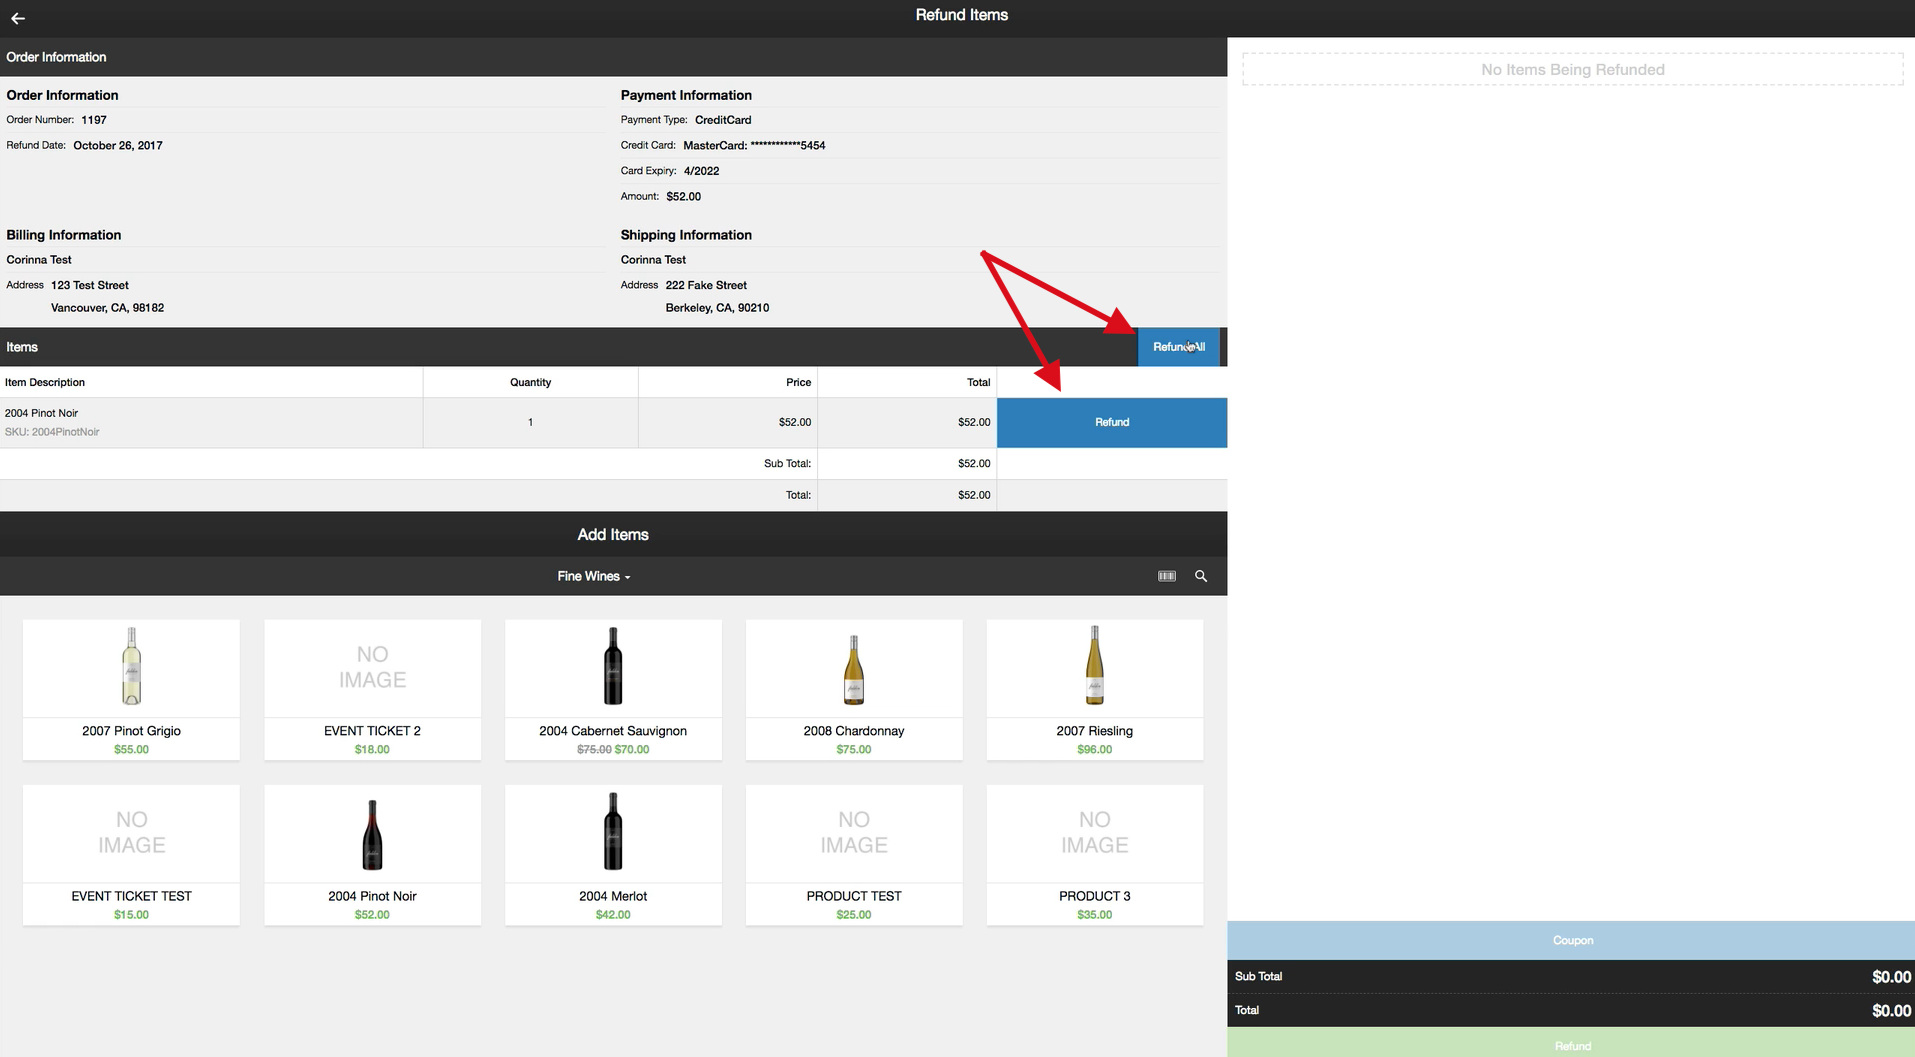
5. You will now arrive on the Refund Items screen where you can choose to refund the entire order or a portion of it. Please note: An order can only have one refund placed against it.
By default any items, taxes, shipping, handling, etc that were originally purchased on the order will not automatically be loaded into the refund. This means that the cart on the right of the screen will be empty until you refund all or a portion of the order:
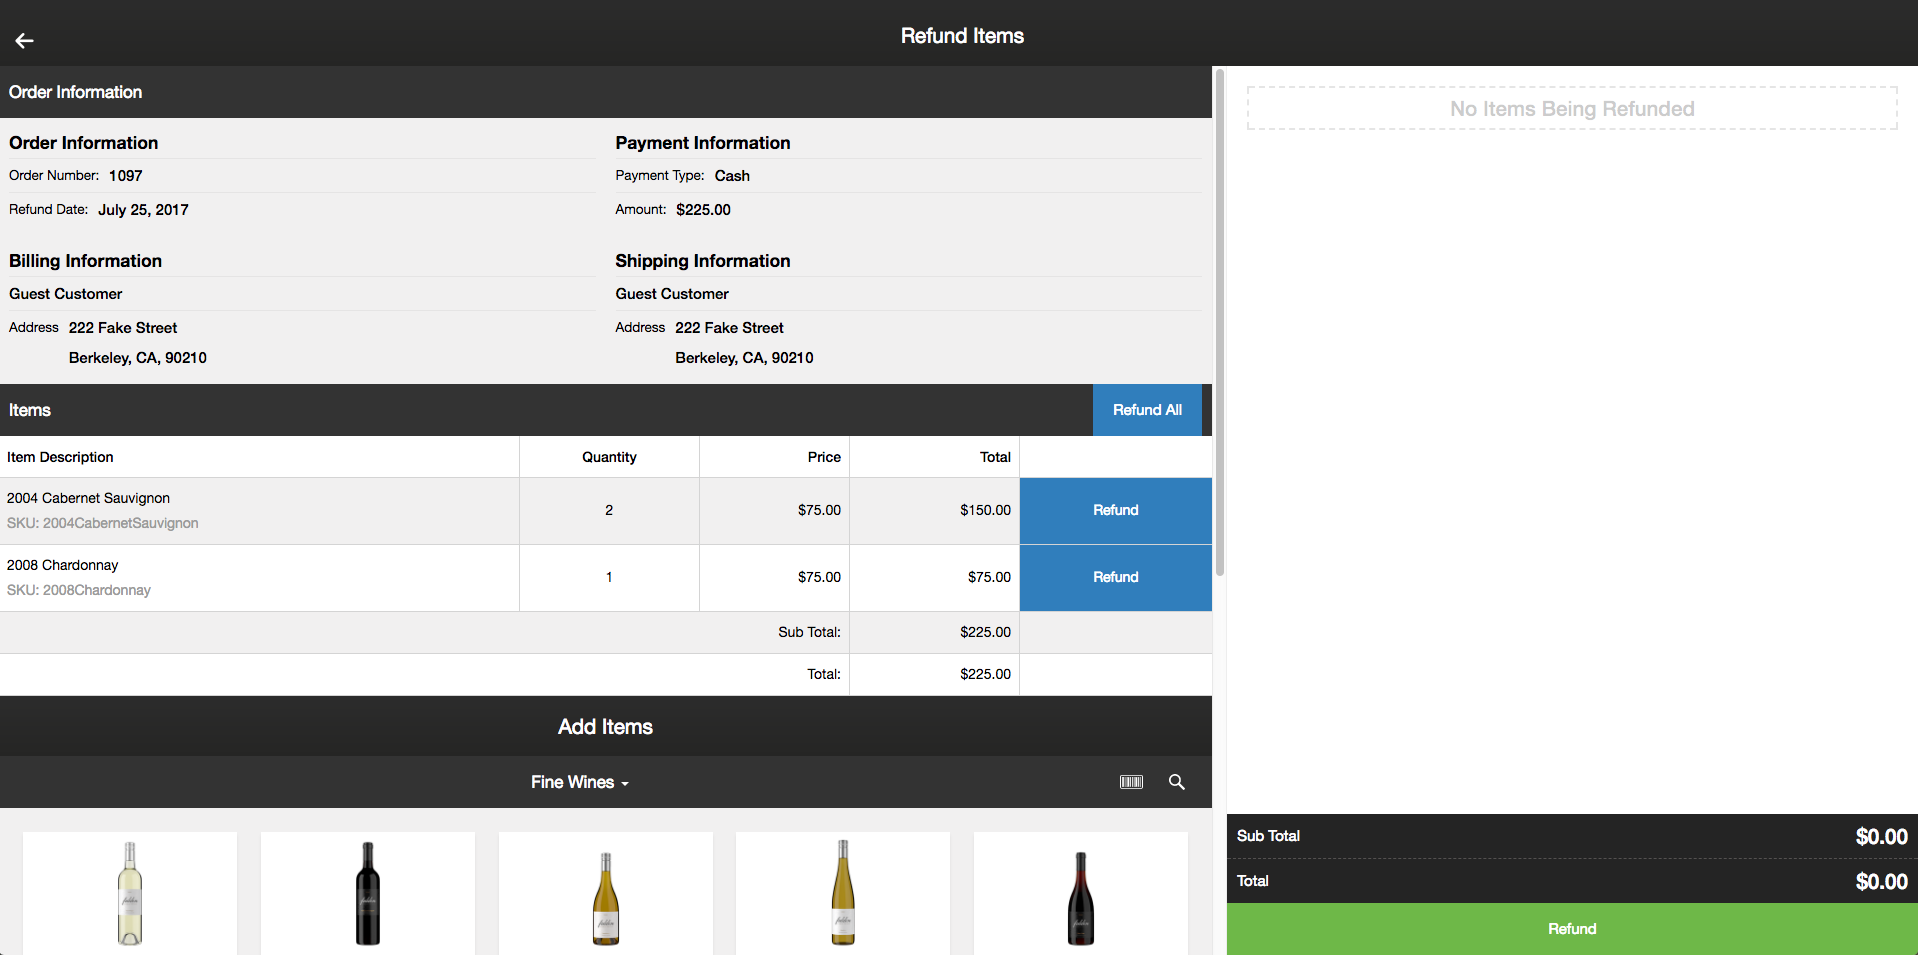
To place a full refund click the Refund All button to add all items, taxes, shipping, etc. from the original order to the refund cart summary. Items will display with ( ) around the values, denoting a negative/refund value. All inventory for the order will be restocked to the inventory pool that the POS profile is assigned to.
You can also adjust the value being returned for an individual item, or whether a product returns to inventory or not, by clicking on the Refund button next to the item or clicking on the item as it appears in the refund cart. Uncheck Restock Inventory if you will just be refunding a portion or all of the value for an item, but will not be returning inventory:
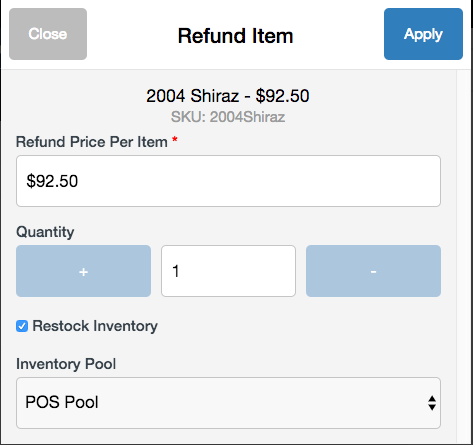
When refunding an item you can only adjust the quantity to the max that was originally purchased on the order, meaning the + and - buttons will not let you exceed the quantity originally purchased. If the customer purchased 12 bottles of Merlot you can adjust the refund quantity anywhere between 1-12 bottles, no more.
6. Once you have double checked your refund and are ready to proceed, simply press the green Refund button.
Be sure to double check your refund before proceeding to make sure that all items, prices, shipping, tips, taxes, etc. have been configured correctly. An order can only be refunded once, so it is best to review the order carefully before completing the refund.
If you need to make any adjustments to the refund you can click Cancel to return to the previous refund items screen.
If you need to make any adjustments to the refund you can click Cancel to return to the previous refund items screen.
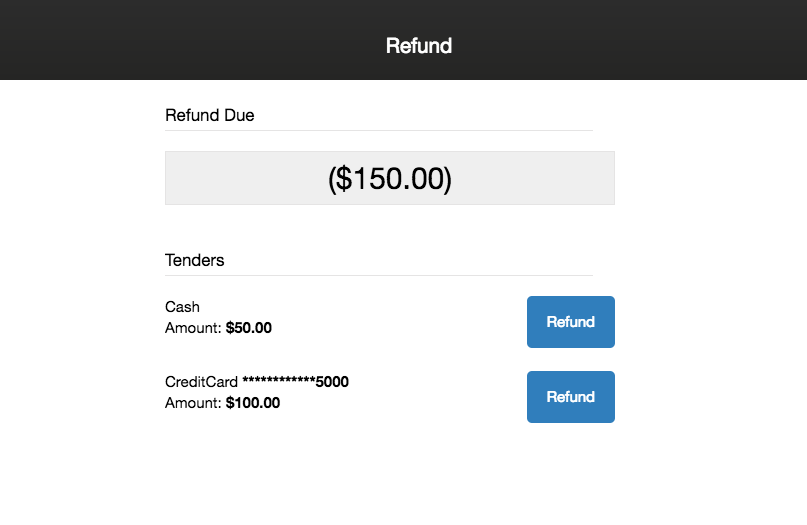
7. Here you will see the refund payments screen. Click Refund next to each of the payment methods/tenders and click Process on the popup window.
This will create a new order number in WineDirect and will appear as a refunded order. This process is very much the same as the WineDirect Admin Panel Partial Refund tool.
POS Pickup Exchanges
The POS refund tools allow you to easily exchange and refund pickup order items.
Exchanges are only eligible for pickup items. Shipping orders are not currently eligible for exchanges.
When placing an exchange you can:
- A) Place a straight across exchange of items where the returning item and the exchange item are the same value.
- B) Refund the difference in value where the item being returned is more than the item being purchased.
- C) Charge the difference in value for the new item, when the item being returned is less than the item being purchased.
$0 Exchange Order
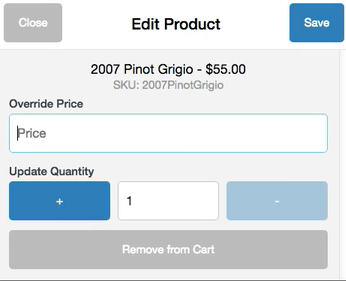
Items being exchanged can have their prices overriden to help reach a $0 total. For example, if a customer is returning a $33 bottle of wine and wants to exhange for a $35 dollar bottle of wine, you can override the $35 bottle to $33 to place an even exchange. Employees should be aware of and comply with any/all policies that you choose to implement regarding exchange orders and overrides.
An exchange order where the item(s) being returned are of equal value to the item(s) being exchanged will result in a $0 order balance, basically a straight exchange of items.
1. Add the item(s) that you want to refund or click Refund All if all items are being exchanged.
2. Use Add Items (below the original order summary) to add the item(s) the customer wants to exchange for the item(s) being returned.
3. If a $0 exchange is desired, override the price of the new item:
4. Once the order total has reached $0 click the green Refund button.
5. On the refund payment screen, click Process Exchange to complete the exchange order.
Negative Exchange Order
A negative exchange order is where the item(s) being returned are of higher value than the item(s) the customer is exchanging them for, resulting in a balance that must be returned to the customer.
1. Individually select the item(s) to refund OR click Refund All if all items are being exchanged:
2. Use Add Items (below the original order summary) to add the item(s) the customer wants to exchange for the item(s) being returned.
3. Once you have added all items to be refunded and exchanged, click the green Refund button.
4. There's one last step! You will now be taken to a refund payments screen. click Refund next to each of the payment methods/tenders and click Process on the popup window.
Once all payment methods/tenders have been refunded, the exhange order will process and complete the order.
Positive Exchange Order
A positive exchange order is an order where the item(s) that the customer is exchanging are worth more than the item(s) being returned, resulting in a difference that the customer must pay for. This means that the customer is not receiving a refund of any funds, but is paying the difference in price between the item(s) they are returning and the item(s) they are exchanging for.
1. Add the item(s) that you want to refund or click Refund All if all items are being exchanged.
2. Use Add Items (below the original order summary) to add the item(s) the customer wants to exchange for the item(s) being returned.
3. Once you have added all items to be refunded and exchanged, click the green Charge button.
4. Unlike refunds where you are returning funds to the customer, the Charge button will take you to Charge screen just like you were placing a new order on the POS.
5. Select the payment method the customer wants to use to pay for the order and proceed through the steps of completing the order. This process is the same as if you were placing a new POS order.
POS Refunds & Exchanges FAQs
- When I restock an item, which inventory pool is the inventory returned to?
- Why is the 'Add Items' section missing when I try to refund an order?
- How do I only refund the money/funds for the order without returning inventory?
- How can I place multiple refunds?
- How do I place a full refund?
- How are exchanges displayed in reports?
- What happens to Shipping Status when an order is refunded?
- What happens to Shipping Status when an order is Exchanged?
When I restock an item, which inventory pool is the inventory returned to?
When restocking an item (returning inventory) during a refund or exchange order, the inventory is automatically returned to the default pickup inventory pool that is assigned to the POS Profile attached to the device being used.
You can manually select which inventory pool an item returns to to by clicking either the Refund button next to the item in the refund summary, or by clicking on the item in the refund/exchange cart summary on the right side of the Refund Items screen. Below the Restock Inventory checkbox, there is a dropdown allowing you to select the desired inventory pool.
Why is the 'Add Items' section missing when I try to refund a shipping order?
Only Pickup orders are allowed to have exchange items added to the refund order on POS. You can still place a refund on a shipping order, but any new items will have to be purchased in a new order.
How do I only refund the money/funds for the order without returning inventory?
When placing a refund order you will have the option to Restock Inventory or not. By default products being refunded will be set to Restock inventory, however you can adjust this per item by clicking either the Refund button next to the item in the order summary or by clicking on the item in the refund cart on the right of the screen (if you have already added the item to your refund). From the popup menu you will want to uncheck Restock Inventory. This will return only the funds for the item but will not return inventory.
How can I place multiple refunds?
It is NOT possible to place more than one refund/exchange order against an order. If a customer is looking to purchase any additional items after a refund/exchange order has been placed against the original you would want to create a new order for the new items.
In the case of an additional refund after a partial refund has already been placed, you will need to do the refund through your Payment Gateway at that point, and do an Order History import with a negative total order to balance any reports.
How do I place a full refund?
To place a full refund click the Refund All button to add all items, taxes, shipping, etc from the original order to the refund cart summary. Items will display with ( ) around the values, denoting negative/refund value. All inventory for the order will be restocked to the inventory pool that the POS profile is assigned to.
Next click the green Refund button to proceed refund payment screen. Click refund and process next to each of the payments on the order and your refund will automatically begin processing once all payments have been refunded. (Typically an order only has one method of payment on it, however it is possible to place a split tender order with multiple forms of payment, requiring that you click refund next to each payment method before the refund will begin processing).
How are exchanges displayed in reports?
There are three types of exchanges: positive, $0, and negative. If an exchange is positive, meaning the customer ultimately spent more money, or if the exchange is a $0 exchange, the Transaction Type is attributed as a purchase and will be reflected as a blank cell in the Transaction Type column of the following reports: WineDirect Fulfillment, Order Summary, Sales Summary, Daily Activity and POS End of Day.
If the exchange is negative, meaning the customer spent less money and was refunded for the difference, the Transaction Type is attributed as a refund and will be reflected as Refund in the Transaction Type column of the same reports noted above.
What happens to Shipping Status when an order is refunded?
On Full Refund, the order you refund will change to No Shipping Required. On Partial Refund, the order you refund will change to Picked Up, if it hasn't been marked as Picked Up.
This setting must first be enabled in POS Profile as outlined here.
What happens to Shipping Status when an order is Exchanged?
Shipping Status for exchanged orders are based on your POS Profile Settings.
- If "Auto Mark Orders As Picked Up" is set on the POS Profile, when items are added to a refund order, the resulting refund/exchange order will have a Shipping Status of Picked Up
- If "Don't Mark Orders As Picked Up" is set on the POS Profile, when items are added to a refund order, the resulting refund/exchange order should have a Shipping Status of Not Picked Up
- In the Admin Panel, when items are added to a refund order, the resulting refund/exchange order should have a Shipping Status of Not Picked Up, by default.