- Content Editor
- General Pages
- Inserting Components
Inserting Components
Content features on the Vin65 platform (such as Business Locator, Photo Galleries, Forms) can be added to your webpages using the component button.
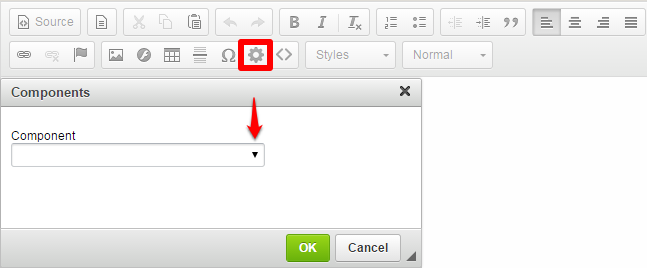
1. Place your cursor at the spot on the page where you want the component to be.
2. Click on the Component wheel button.
3. Choose the component you would like to insert from the drop down menu and click OK.
*Components don't work inside Content Blocks. They do work inside of Pods.
The following are a list of component short names that appear in the component dialog box:
| BlogCategory | Any blog categories you've set up as a component using the Blog Feature. This allows you to display a list of blog posts that fit into a given category. |
|---|---|
| BusinessLocator | A map of business generated when using the Business Locator Feature. Placing this component on a content page allows customers to view businesses featuring your wines. |
| ClubList | A list of your Clubs. This component allows your customers to sign up on any or all of your clubs to become a member. |
| EmailCategory | Any email categories you’ve designated as a component using the Email Documents Feature. This allows customers to view past email newsletters. |
| EventCalendar | Any custom event calendars you create using the Events Feature. |
| Form | Any custom forms you create using the Form Builder Feature. |
| PhotoGallery | Any photo galleries that you create using the Photo Gallery Feature. |
| Poll | Any custom polls created using the Poll Feature. |
| ProductList | Your products will display in this component in a list format. |
| ProductSet | If you have a Product Set it will appear in this component. |
| Recipes | Any recipes that you've built or written using the Recipe Feature. |
| SiteMap | The Site Map is a tree style list of all your web pages. This is placed on the 404 error page to allow customers to navigate to a page on your site if they stumble across a broken link. |
You can only add one component per webpage. You cannot have multiple components per page.