- Content Editor
- Recipes
Recipes
Wine and good food go well together. The recipes tool allows you to offer a recipes page to your visitors to encourage the sales of your wines and products. The Recipes tool can be found under Content Editor > Components > Recipes. Below are the steps to set up Recipes.
If you do not currently have the recipes tool and you would like to use it please contact your designer or support@winedirect.com. Billable design work will be required to style the feature if you do not have a designer to setup the feature for you.
Adding A Recipe: Learn how to add a new recipe by completing the General, Ingredients, Directions, Featured Product, and Marketing tabs in the recipe builder. Learn More >
Placing Recipes On Website: Learn how to have your recipes appear on your website. Learn More >
Adding A Recipe:
1. Navigate to Content Editor > Components > Recipes.
2. Click on the green Add A Recipe button.
3. Follow the tabs in order from General, Ingredients, Directions, Featured Product, and Marketing tabs.
General Information Section:
Once you fill in these details you will want to make sure that the Active checkbox selection is checked so that it can display on the website.
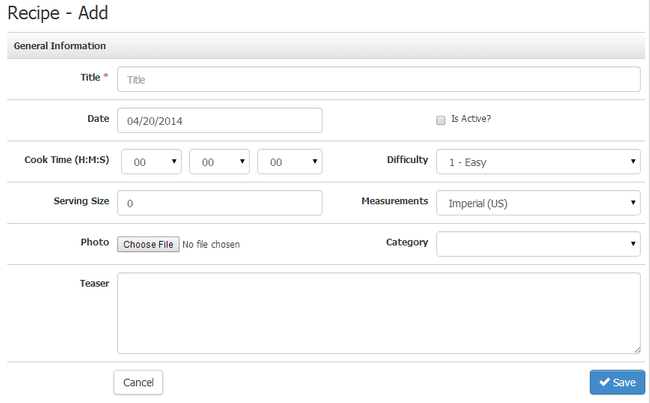
1. In the Title field, name your recipe. Please note the title is a mandatory field.
2. In the Date field, enter the date.
3. Check the Is Active box to make your recipe active on your website.
4. In the Cooke Time (Hour:Minutes:Seconds), enter the total time it takes to make the recipe.
5. In the Difficulty field, select the level of difficulty: 1 - Easy, 2 - Medium or 3 - Hard.
6. Enter the Serving Size for the recipe.
7. In the Measurement field for your recipe, select if it is Imperial (US) or Metric.
8. Upload a Photo for your recipe and select a Category for your recipe to go under.
9. The Teaser is optional but it is best to enter something to attract your readers to the recipe. Click Save.
Recipe images must be a .jpg or .png file and cannot contain spaces or special characters (i.e. $#@%&) in the image name.
Ingredients Tab:
Here you can add multiple ingredients to the recipe, providing an order number of how it should display, the amount in specific units of either tsp, tbsp, cup, oz and lb.
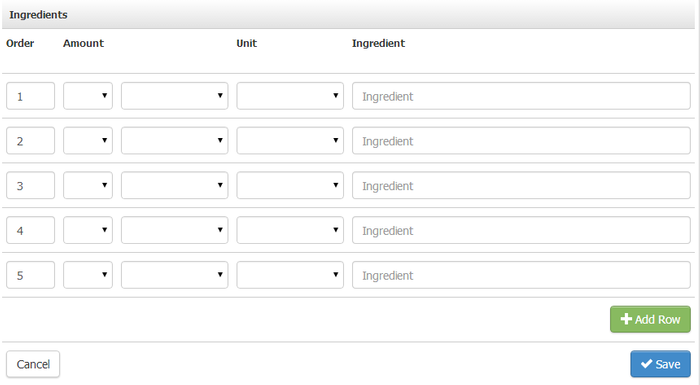 1. Enter the Ingredient name.
2. Click on the Amount drop down menu and select he amount to use.
3. If you want to select an Amount in fractions, select the middle drop down menu.
4. Click on the Unit drop down menu and select the proper measurement.
5. If you want to add row, click on the green [+] Add Row button and click Save.
Directions Tab:
The direction tab allows you to enter the preparation details for your recipe. Entering content will be similar to website pages or product details.
1. Click on the blue Edit button.
2. Enter the context for your recipe direction. You can upload images, video and links just like other webpages.
3. Click Save.
Feature Product Tab:
The Feature Product Tab allows you to highlight wines or products that are either used in and/or pair well with with your recipe. Related wines/products will appear below your recipe on the recipe drill-down page. To added related wines you will:
1. Click on the blue Edit button.
2. Then choose your product by searching your entire product list and check the box.
3. Click Save.
Marketing Tab:
The marketing tab allows you to manage the marketing URL for your recipe page. Marketing URLs are created while you name your product and allow for your customers to remember and find your recipes easily.
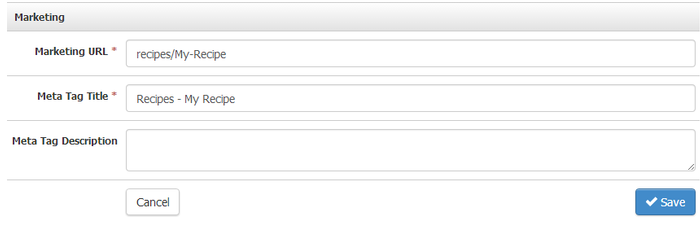
1. Click on the blue Edit button.
2. In the Marketing URL field, enter the marketing URL.
3. Enter the Meta Tag Title field. Example: Recipes - My Recipe.
4. Enter a Meta Tag Description if you want.
5. Click Save.
Adding Recipes to your Website:
The recipes tool automatically creates a recipes page for your site where all the recipes you add will automatically appear. You will want to make sure this page is active and can assign it you your menu navigation using the page properties section of the page. For more information please see the Page Properties Documentation.
Additionally your recipe categories will become available as components. For more information on adding recipe category components to a page please see the Inserting Components Documentation.