Editing Template Aviato
About This Template
Aviato puts the focus on ecommerce. Drive people to buy wine right from the homepage on any device with call to action buttons and featured products. Checkmate.
Some of the features include:
- Large full screen image with a call-to-action button
- Showcase featured products underneath the header image
- Page search tools
View the live preview here.
Header
Logo
This can be edited under Settings > Website Editor > Header & Footer. Learn more here.
If you signed up before January 31, 2019, the feature to be able to upload your own logo will not be available in your admin panel. Please send your logo to your project manager to update.
Main Menu
To add a page to the main menu, in the admin panel, navigate to Content Editor > General Pages. Select the page you would like to add and click Page Properties > Main Menu > Yes. To remove a page, click Main Menu > No.
Homepage
Homepage Background
This is managed under Content Editor > Content Blocks. Here you can edit the Content Block Homepage Background or Add A New Content Block and give it the Group or Homepage Background. Upload your image, save, and you are good to go!
Homepage Header Content
This text can be added or edited under Content Editor > Content Blocks > Homepage Header. You have the ability to add your own text and change the button link and text.
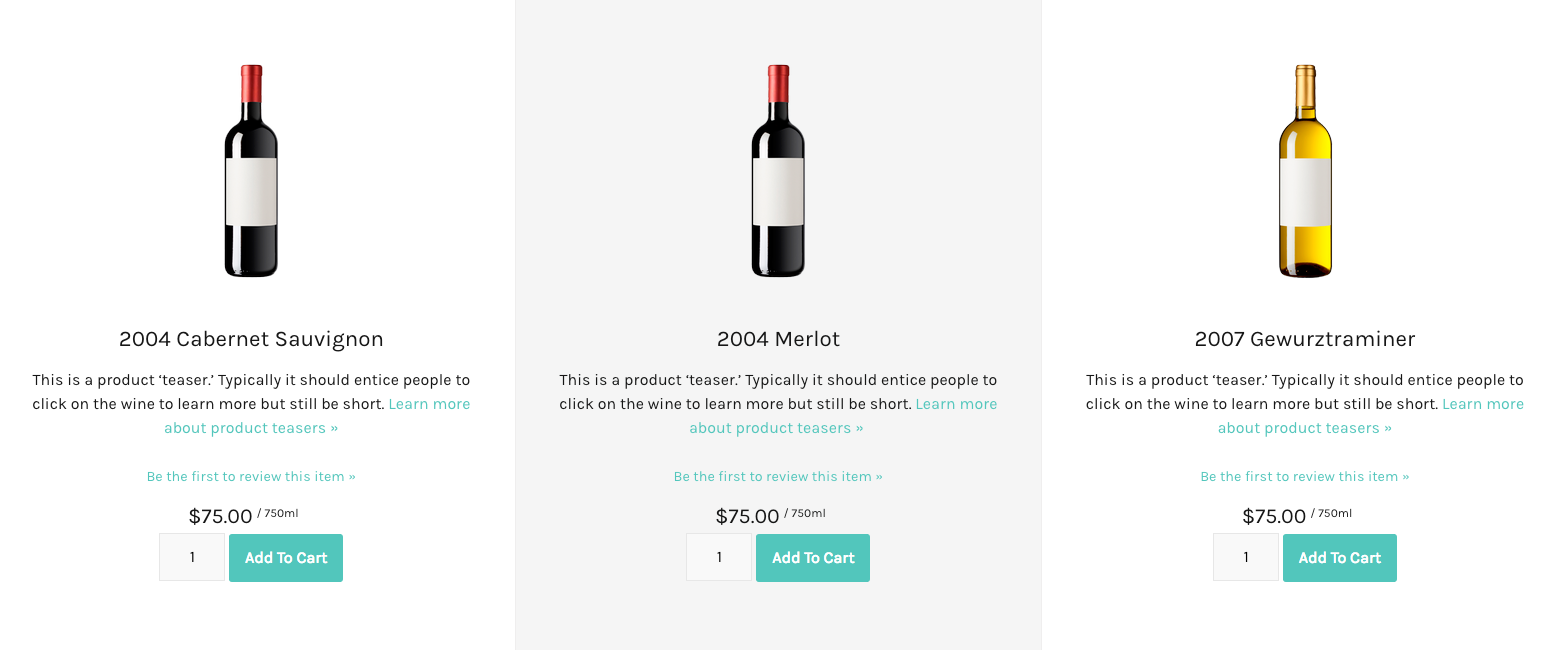
Featured Products
These products are added to the Homepage through the Product Group Featured Products. After clicking on a product, it can be added under Categories > Product Groups > Featured Product.

Image Content Sections
These are content blocks. To add one go to Content Editor > Content Blocks > Add A Content Block > select the Group of Homepage Image Content Section. To edit one go to Content Editor > Content Blocks > Homepage Image Content Section. You can then add your content and an optional button.

Homepage Content
This text can be edited under Content Editor > General Pages > Homepage.

Newsletter
This form is connected to the Contact Type of 'Newsletter'. Any user who fills it out will be added to that contact type. The title 'Newsletter Sign Up' can be edited under Content Editor > Pods > Newsletter Title.
Footer

Footer Left
The title can be edited under Content Editor > Pods > Footer Left Title. The pages that display underneath are managed in the Content Editor. To add or remove a page from the footer, select the page, click Page Properties > for Footer Menu select Yes or No.
Footer Middle
The text can be edited under Content Editor > Pods > Footer Middle Content.
The social media icons available to use are Facebook, Twitter, Instagram, Yelp, Trip Advisor, Youtube, Vimeo, and Pinterest can be edited under Settings > Website Editor > Social Media Links. Learn more here.
If you signed up before January 31, 2019, the feature to be able to upload your own logo will not be available in your admin panel. Please send your logo to your project manager to update.
Footer Right
This title and text can be edited under Content Editor > Pods > Footer Right Content.
Custom
Layouts
If you want to get rid of the sub navigation on a page like this one, go to Content Editor > select the page > Page Properties > Layout > Wide Page.

Custom Page
In order to apply this layout to one of your own pages, while in the Content Editor, click on the page > Page Properties, and set Page Layout to Custom Page.
After applying the Custom Page layout, you have the ability to add the Top Content Block sections, the Custom Image Content sections with images, or the Bottom Text Content. You can add some of them or you can add them all. They are all setup here to show you the options for customization.

Top Content Blocks
Go to Content Editor > Content Blocks > Add A Content Block > select the Group of Top Content Section. You can then add your content and select the width of the box. After saving, select the page/s that you want it to appear on. (The page you select, must have the page layout of Custom Page as described above in order for it to appear.)
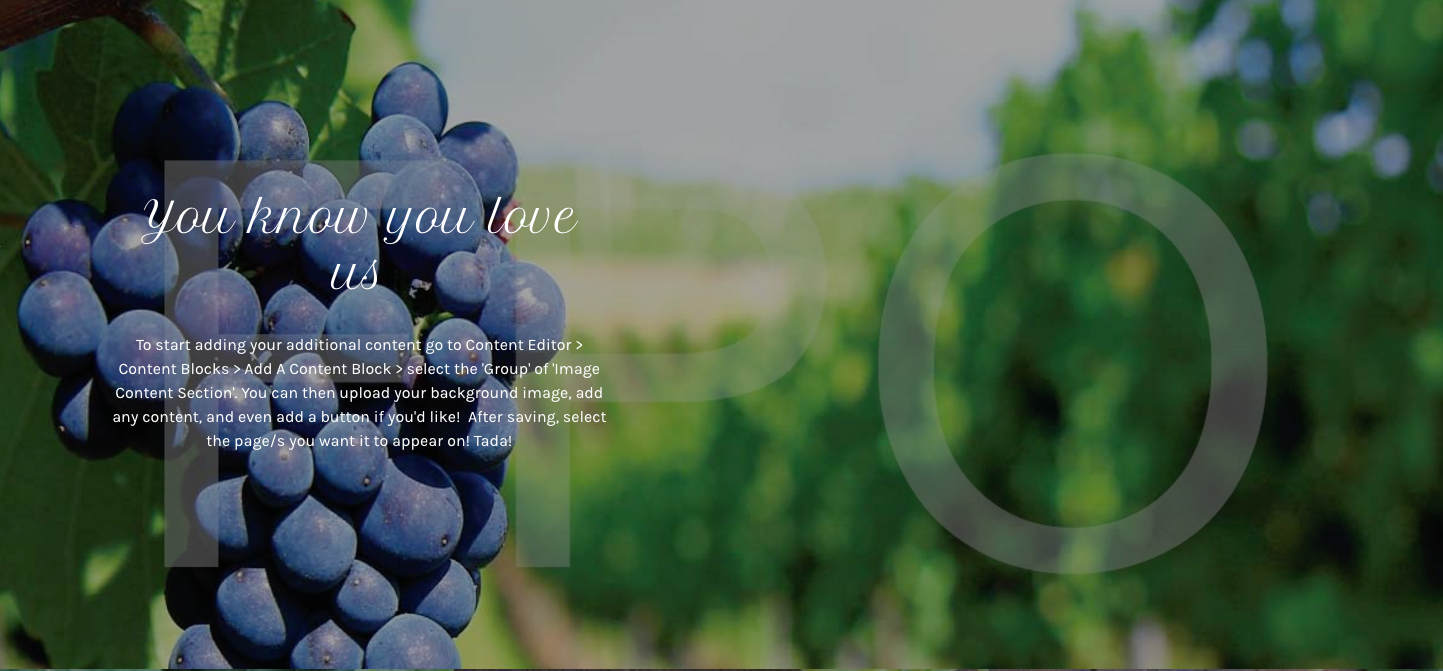
Image Custom Content
Go to Content Editor > Content Blocks > Add A Content Block > select the Group of Image Content Section. You can then upload your background image, add any content, and even add a button if you'd like! After saving, select the page/s you want it to appear on. (The page you select, must have the page layout of Custom Page as described above in order for it to appear.)

Bottom Text Content
Go to Content Editor > Pods > Add A Pod > select the Location of Bottom Text Content. You can then add all of your text and after saving, select the page/s you want it to appear on. (The page you select, must have the page layout of Custom Page as described above in order for it to appear.)