- Content Editor
- General Pages
- Inserting Tables
Inserting Tables
Tables are useful when trying to format data or images on a page. They can also be used to add labels to images. Read the following text to learn more about inserting and editing tables:
If you site is responsive, make sure to use percentages as widths so that it will continue to work on all devices sizes. (ie 50%, 25%, etc.)
Insert A Table: Learn how to insert a table on your site page. Learn More >
Editing Tables: Learn how to edit a table on your site page. Learn More >

Insert A Table
1. Clicking on the Inserting Table icon renders the Table Properties dialog box.
2. Set the number of rows and columns you will need.
3.The border size is defaulted to blank. The Border Size will determine the thickness of the border.
4. Select an Alignment if you wish your table to be near left or right of page.
5. The Caption displays at the top of your table. You may choose to enter something here or leave it blank if you like.
6. Determine the width and height of your table and click OK.
The text in the table can be adjusted for alignment left, right or center.
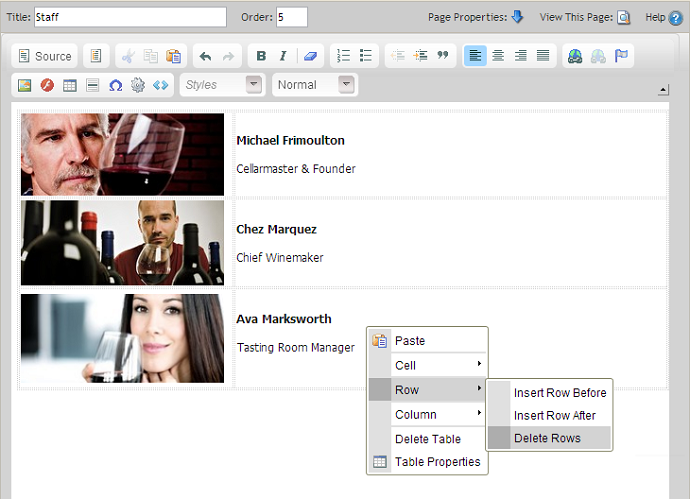
Editing Tables
Once you have placed a table on a page you can edit the table adding or removing rows as needed. To edit the table click your cursor in the cell (within the row) where you would like to add a row before or after. Then right click your mouse which will cause a new window/pop-up to appear. Hover over each Row then from the sub navigation, you’ll have the option to:
- Insert Row Before
- Insert Row After
- Delete Rows