- Designer Launch
- Content Page Customization
- Templates
Templates
Templates allow designers to create reuseable designs for custom website content and email documents for their clients.
Add A Content Block Template: Learn how a designer can create a new content block template the can be used for new content blocks. Learn More >
Add A Content Block: Learn how to add content to your website using Content Blocks. Learn More >
Add An Email Template: Learn how a designer can create a new email template the can be used for new email documents. Learn More >
Adding An Email Document: Learn how to add email documents with the newly created template. Learn More >
FAQS: Review frequently asked questions regarding content templates. Learn More >
Add A Content Block Template
To access the Templates section your admin user account must be marked as Is Developer. For more information please see the Admin User Documentation.
1. Create Content Block Template
1. Go to Settings > Templates.
2. Click Add A Template.
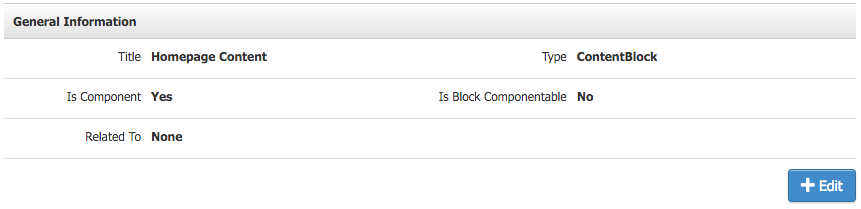
3. Enter the name of your template in the Title field and select Type = Content Block.
4. Next set the display options for your template. You can choose to select Is Component and/or Is Block Componentable.
| Is Component | Allows you to display all of the Content Blocks that belong to this specific Template together through one component. (It will be added to the page through the components tool.) |
|---|---|
| Is Block Componentable? | Allows you to display a single Content Block that belongs to this Template onto a page. A unique component is generated for every Content Block created and they can be added onto completely separate pages throughout site. |
If you are wanting to pull the Content Blocks into your template file instead of adding it through the Content Editor, you can use the v65:contentblock tag. This tag be placed in the HTML of any page to dynamically pull in all the Content Blocks that are part of a specific Template.
5. Related To. For general use, you can leave this area blank. If you are wanting this template to display on only specific content or product pages, check off the corresponding boxes.
| Pages | If this is checked off, Content Blocks using this template can be applied to display on only certain Content Editor pages. After you have created the Content Block under Content Editor > Content Blocks, there will be a list of all pages where you can check off the pages that it will display on. |
|---|---|
| Products | If this is checked off, Content Blocks using this template can be applied to specific products using a custom layout that includes the v65:contentblock tag. After you have created the Content Block under Content Editor > Content Blocks, there will be a list of all products where you can check off the products that you want that custom content to display. |
6. Click Save.
After you have set the display options, you can move onto the Template Elements, which will allow you to create the content sections that make up your Content Block template.
2. Add Template Elements
Under the Template Elements section you'll setup the different sections for the Content Block Template. There are 8 different elements to choose from: Text Box (Single Line), Text Box (Multi Line), HTML Content, Numeric Field, Upload Photo, Option List, Yes/No, and Upload File.
Click Add Element, then choose what element type you would like to use. Make a general label for what should be input here by the user, then fill out the rest of the element, depending on whatever type you have chosen. See below for the list of element types and their uses.
Element Types
| Text Box (Single Line) | Add a single line field. The plain text is output. |
|---|---|
| Text Box (Multi Line) | Add a multi line field. The plain text is output. |
| HTML Content |
Displays Text/Content Editor and allows user to upload photos, links and change text size, etc. The HTML from editor is output. |
| Numeric Field | Add a single line field for numbers. The plain text is output. |
| Upload Photo | Add the ability to upload a photo. The url of the photo is output. |
| Option List | Add a dropdown of user set values. The selected value is output. |
| Yes/No | Add the ability to choose 'Yes' or 'No'. 'Yes' or 'No' is output. Learn More > |
| Upload File | Add the ability to upload a file. The url of the file is output. |
Yes/No
The 'Yes/No' elements output with a 'Yes' or 'No' depending on what is selected by the user in the Content Block.An example use would be to alter an attached css class. For example:
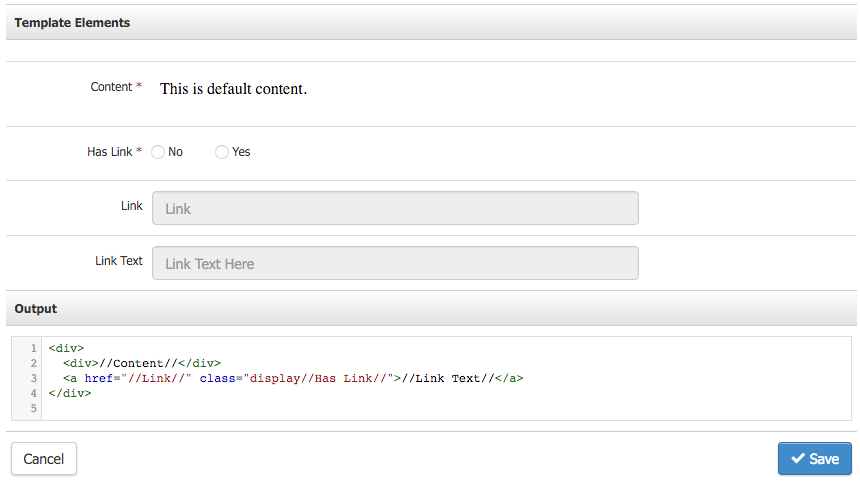
This is a Template with an optional field for a link. If 'No' is selected, the link would have a class of 'displayNo', if 'Yes' is selected, 'displayYes'. You can have css properties for each depending on what is chosen. (Hide the element is 'displayNo' is the class.) The benefit of this is being able to use one Template for multiple Content Blocks that are similar.
3. Create HTML Output
Once you have finished adding elements, the output must be created. The output is the HTML that is used when the template is rendered on the website.
After you have created the HTML structure for the Content Block Template, you can place where you would like your elements to display. If you have an Upload Photo element with a label of 'Image', for example, wrap the label in forward slashes [i.e. //Image//]. When the user is creating a new Content Block, whatever they put into that element will be displayed in place of its name.
Add An Email Template
To access the Templates section your admin user account must be marked as Is Developer. For more information please see the Admin User Documentation.
1. Create Email Template
1. Go to Settings > Templates.
2. Click Add A Template.
3. Name your template and select Type = Email.
4. Click Save.
This will allow you to create the basic template. The next section that appears, Template Elements, will allow you to create the content sections of the email template.
2. Add Template Elements
Under the Template Elements section you'll setup the different content sections for the email template. There are 5 different elements to choose from: Text Box (Single Line), Text Box (Multi Line), HTML Content, Numeric Field, and Upload Photo.
Element Types
| Text Box (Single Line) | Add a single line field. The plain text is output. |
|---|---|
| Text Box (Multi Line) | Add a multi line field. The plain text is output. |
| HTML Content |
Displays Text/Content Editor and allows user to upload photos, links and change text size, etc. The HTML from editor is output. |
| Numeric Field | Add a single line field for numbers. The plain text is output. |
| Upload Photo | Add the ability to upload a photo. The url of the photo is output. |
Add An Element
Click Add Element, then choose what element type you would like to use. Make a general label for what should be input here by the user, then fill out the rest of the element, depending on whatever type you have chosen. See below for the list of element types and their uses.
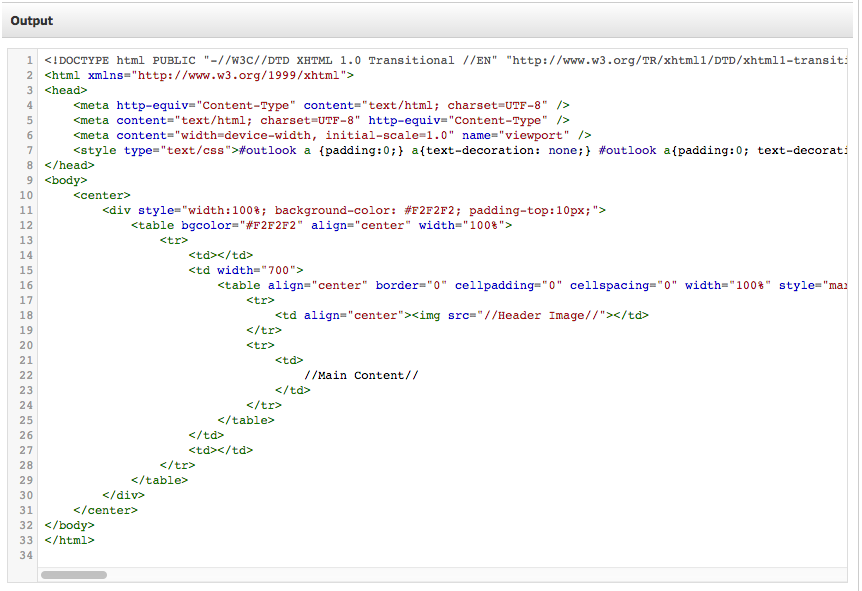
3. Create HTML Output
Once you have finished adding elements, the output must be created. The output is the html that is used when the template is rendered. After you have figured out the html structure for the template, you can place in the elements that were added above by wrapping the names of those elements in forward slashes [i.e. //Image//]. When the user is creating a new email document, whatever they put into each element will be displayed in place of its name.
Template FAQs
I have made Template Elements for my email, but they are not populating when I make an email document.
Every template element has to be added somewhere into the HTML within the Output section. This can be done by including //ElementNameHere// in the location in the HTML that you wish for the element to appear.