- News Release
August 25, 2017 | Corinna Wang
Webinar: Enhanced Reporting 101
In case you missed the enhanced reporting webinar on August 24th, we've recorded it for you. It should help get you more comfortable with the new reporting tools.
We encourage you to familiarize yourself with the new reporting tools - they're faster, more stable and will save you time. If you have further questions, please check out the Documentation, or contact our support team at support@vin65.com.
August 15, 2017 | Corinna Wang
New: Enhanced Reporting Tools
You asked for it, we built it: Starting today, your Vin65 reporting tools are now simpler, faster and more powerful. Over the past several months, with your feedback, we have built new, more robust reporting functionality in Vin65. These tools enable you to quickly and more easily run reports, especially on large datasets. You can now:
- Work more efficiently by running large reports quickly, with no more timeouts
- Save time by scheduling recurring reports (available exclusively to Plus/Enterprise clients)
- Continue working while your reports run in the background
-
Customize your reports on the fly with flexible filters & columns
No action is needed on your part: by accessing the Reports tab in the Admin Panel, you will automatically be using the new tools. Note that the old reporting interface will continue to be available for 6 months so that you can become 100% comfortable with the new tools.
If you currently use custom reports, they will move to the new interface in the next stage of development. For now, you can access your custom reports through the old reporting interface.
We encourage you to check out the Documentation and FAQs.
July 25, 2017 | Vin65 Team
Updated reCAPTCHA Process
Update: Google reCAPTCHA is live but action is required to turn reCAPTCHA on for blogs and product reviews.
Many of you have let us know about issues you were experiencing with spam on forms, product reviews and blogs. We recognize that this was frustrating for you, so we have now implemented a new Google reCAPTCHA tool that will prevent robots from submitting future spam to your forms, product reviews and blogs. Here's what it looks like:
Adding reCAPTCHA on Forms
To add reCAPTCHA to a new or existing form on your website, simply add a new form question and select "Google reCAPTCHA" as the question type. The reCAPTCHA box will now appear at the bottom of your form. Learn More>
Adding reCAPTCHA on Product Reviews and Blog Comments
To enable reCAPTCHA for product reviews and blog comments, just reach out to support via a quick form and they'll turn on the setting for you. Add reCAPTCHA Now>
July 19, 2017 | Vin65 Team
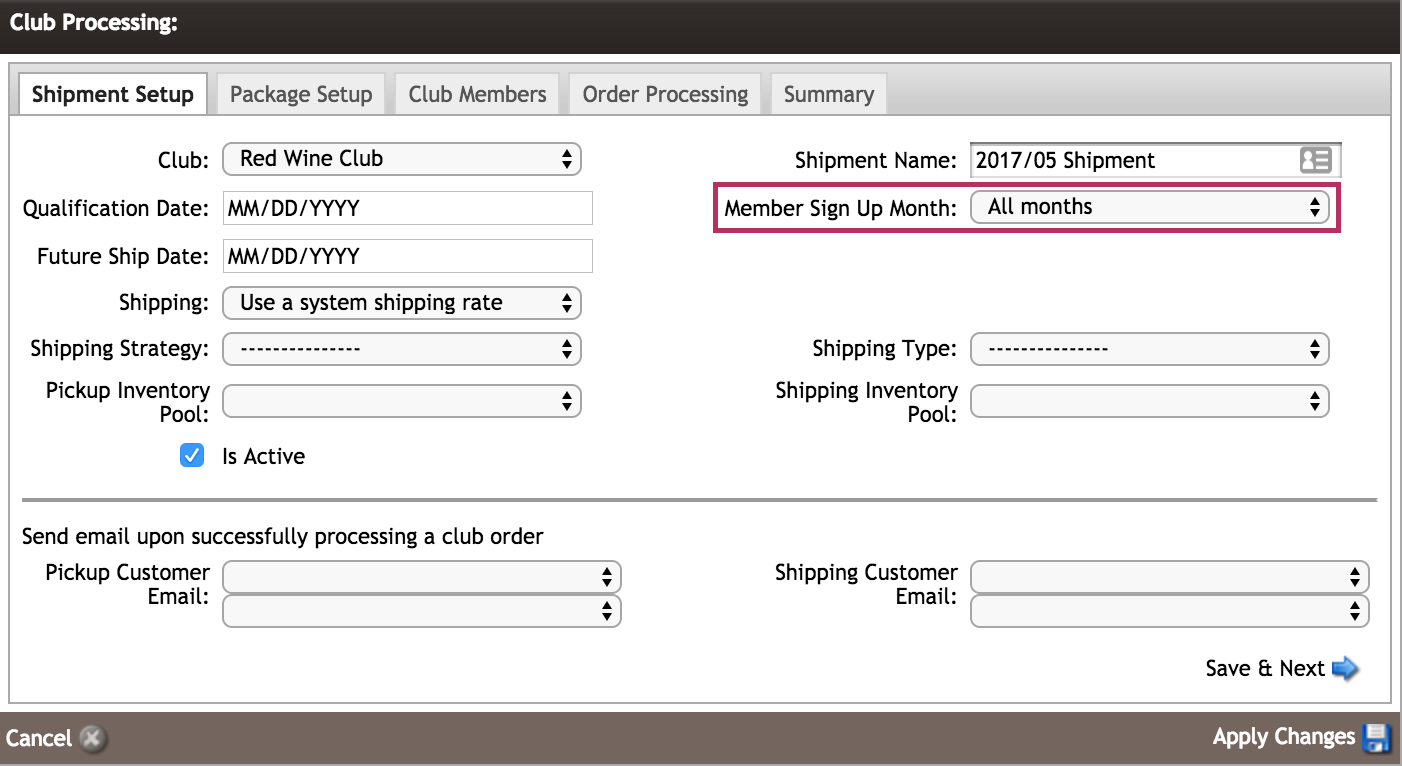
Flexible Club Shipments with Our New Member Sign Up Field
As customers demand more flexible wine clubs, you need tools that make it easy for you to meet their expectations. That's why we've added the ability for you to run clubs based on member signup month.
Your members won't have to wait for the next scheduled shipment - which could be months away - they can start receiving their wine immediately. Processing clubs by signup month also allows you to run smaller batches of orders more frequently, rather than doing large club runs a few times a year.
To process your wine club by signup month, simply select one or multiple months from the new Member Signup Month dropdown menu in the Shipment Setup tab in the club processing window. This will filter in members who signed up in your chosen months across all years. Want to continue to process your club regardless of signup month? Simply select "All months" from the menu.
Offering wine club delivery on a rolling basis is just one more way you can provide a more customer-centric experience, that converts more new members and retains existing ones for longer.
July 12, 2017 | Vin65 Team
Improved Formatting for Email Receipts
We have adjusted the design elements of our email receipts to make the information easier to understand for your customers. This adjustment includes shifting the Payment Details section closer to the order information, and adding lines to better separate the details of the order.
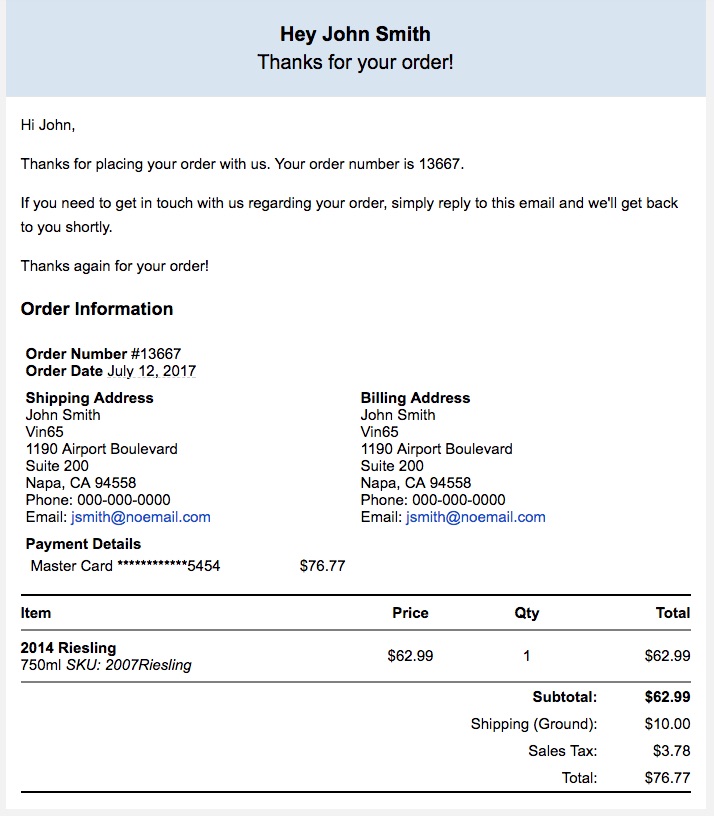
In addition, on POS receipt, if you use our 'Tax Included' feature, these now show properly on the print receipts.
July 11, 2017 | Vin65 Team
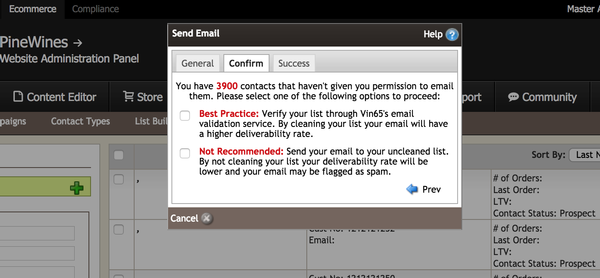
Improved Email Deliverability With SendGrid
We have updated our email system so all emails are sent through SendGrid. This improves deliverability and reduces bounces, and we have also updated the UI around the Send Mass Email function to add clarity on how to ensure your lists are sent with the highest success rate.
April 28, 2017 | Vin65 Team
Customer Name and Number Added to POS Receipts
To help you with your pickup processes in the tasting room, we have added Customer First Name, Last Name and Number to our POS receipts.
April 27, 2017 | Vin65 Team
Introducing POS Category Assignments for POS Profiles
The data on your POS needs to be well organized so your staff can focus on selling to your customers.
To make this easier, we're introducing assignments for POS Categories to POS Profiles, so you can display only the products you want within each of your POS Profiles.
When you add a new POS Category, make sure you assign it to a POS Profile (or a few!). Only the products within that Category will then be displayed on your POS. Similar to how you can currently arrange products within a Category, you will also be able to arrange the order in which your Categories display within your Profiles so you can choose which products your staff sees first.
By default, all existing POS Categories will apply to all POS Profiles and you will not be affected until you go into either POS Categories or POS Profiles to modify the assignment settings. You can also assign Categories to your POS Profiles directly from the POS Profile section of the admin panel.
Learn more about assigning Categories in POS Profiles >
April 18, 2017 | Vin65 Team
Australia Post and Fast Way Added to Package Tracking
The Package Tracking feature included in Plus packages now includes Australia Post and Fast Way for our Australian and New Zealand client base.
January 26, 2017 | Vin65 Team
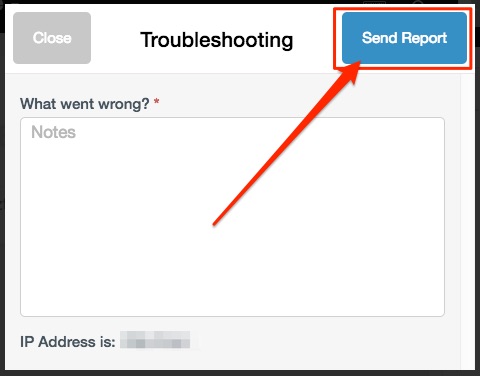
Introducing the POS Troubleshooter
If you run into bugs or errors on the POS, we have a new debug window that you can report your issue to and alert our team to review.
Select "Help" on the POS Menu to get started or read the documentation to learn more.