- Designer Launch
- Getting Started
- Setting up Email Templates
Email Template & System Emails
Watch the tutorial video and read the following text to learn about editing the Default Email Templates. Once the templates have been modified you can generate the system emails for the account.
Editing Default Email Templates: Learn to setup default email templates on your website. Learn More >
Creating Your System Emails: Learn to create your system emails for your website. Learn More >
Creating Custom Email Templates: Learn how to create custom email templates for client marketing emails. Learn More >
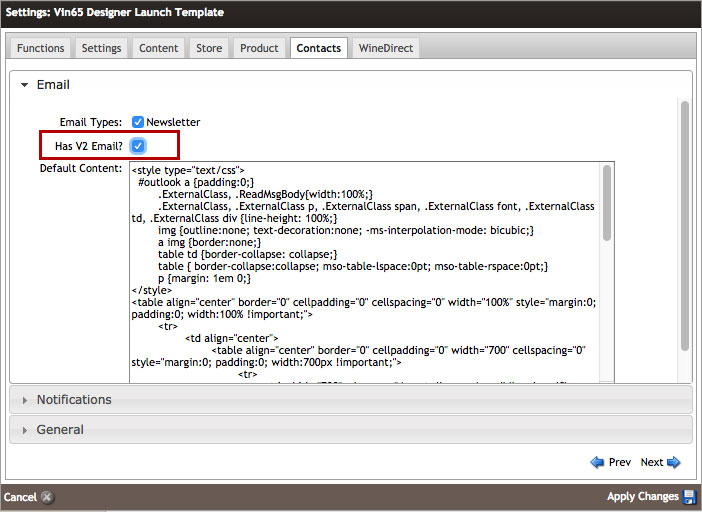
Enabling V2.1 Emails
Navigate to Settings > Website Settings > Contacts > Email and check Has V2 Email?.
Editing Default Email Templates
You must first edit the default email templates before you can create your system emails.
1. Go to Settings > Templates.
2. There will be 3 default templates that have been setup: Default Email, Default System Email - Error, Default System Email - Success. Click on the template you want to modify. (Modifications will be required for all 3 templates.)
3. Items that you will want to change on the default email templates are:
- Replace the Header Image default content. This will appear by default in for all new emails created that are using this template, but a different image can be uploaded when editing the email.
- Use template Output to edit the company address, social media links or change HTML.
In the default email documents you cannot add any addition form or upload fields. If you are wanting to make a custom email template for marketing or newsletter purposes, you can do so by creating a brand new email template. Learn more here.
Creating Your System Emails
After you have the default template setup, you can then generate system emails. Since system emails go out automatically, they must be created so that no system errors occur. Follow the steps to create your system emails:
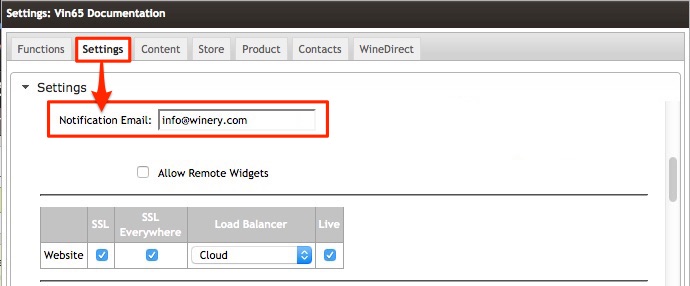
1. Go to Settings > Website Settings > Settings and scroll down until you see the Notification Email field. Enter the email address the client will use to send and receive their system emails.
2. Go to Settings > Website Settings > Functions > Setup V2.1 Emails.
3. All system emails will be checked to be setup by default. Vin65 suggests creating all system email documents even if the winery will not be using all the features right away. System emails will only be sent out when they are triggered by the system action for the feature that they assigned to, so if the winery is not using a feature at the moment the system email for that feature will not be sent out.
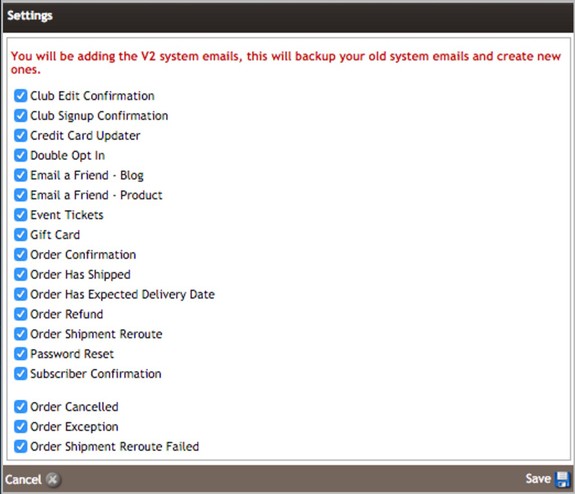
4. Click save.
Creating Custom Email Templates
After you have setup the System Emails, you can also setup additional email templates for your clients to use for marketing, newsletters, etc. You can make these as custom or as simple as you would like.
For full instructions on setting up custom email templates, click here.