- Content Editor
- Blog
Blog
Wikipedia: A blog (a contraction of the term "web log") is a type of website, usually maintained by an individual with regular entries of commentary, descriptions of events, or other material such as graphics or video. Entries are commonly displayed in reverse-chronological order. "Blog" can also be used as a verb, meaning to maintain or add content to a blog.
Add A Blog Post: Learn how to add a blog post. Learn More >
Blog Authors: Learn how to assign blog posts to authors. Learn More >
Blog Categories: Learn how to separate your blogs into different categories. Learn More >
Blog Entries: Learn how to add and edit your blog entries. Learn More >
Marketing: Learn about marketing properties for blog posts. Learn More >
Comments: Learn about comments made on your blog posts. Learn More >
Delete A Blog Post: Learn how to delete a blog post. Learn More >
Blog Frequency: Learn additional information on blog posts. Learn More >
Adding a Blog Post
Before creating a blog post for the first time you will need to setup a blog author to assign the post to, as well as create optional categories to help organize your posts and help your readers access specific topics.
Blog Authors
The blog author option allows you to assign blog posts to a specific writer. Blog authors can include a small photo or author icon which will be associated with each post. Blog posts can also be sorted and viewed by author. Additionally all comments for a blog post will be emailed directly to the author of the blog post. The following steps will help you create and manage your blog authors.
Creating A New Author
You can either create a new blog author while creating writing a new blog post, or through the Manage Blog Authors section on the right hand side of the blog screen.
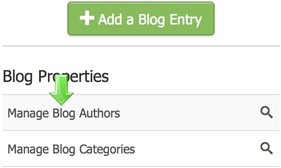
1. Navigate to the Content Editor section > Blog subsection > Click Manage Blog Authors.
2. Click the Add a Blog Author button.
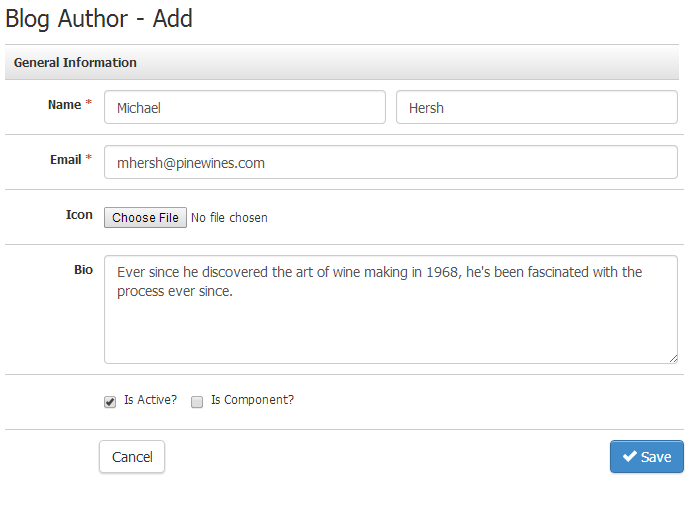
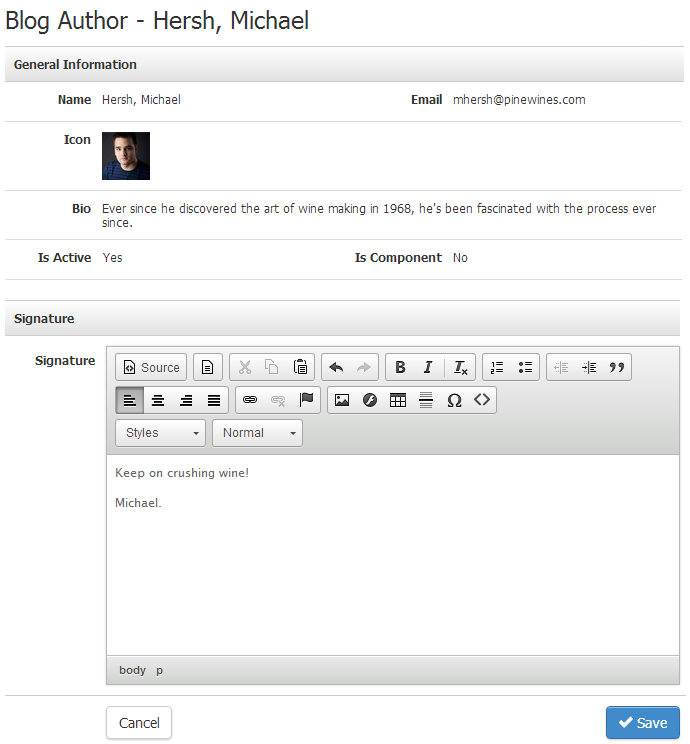
3. In the General Information section you will be asked for the first & last names of the author as well as their email address. Comment notifications made on an author’s blog post will be emailed the blog author. You can add an avatar icon, which will appear next to the authors name on the website (Ideally 48 X 48. Must be a JPG). You can select whether a blog author is active or not. Posts made by inactive authors will not display on the website. Bio information and a digital signature can be added as well. Once you "Save" the General Information, you can now click the blue "Edit" button to add a Signature for your new Blog Author.
4. In the Signature section you will be able to enter in the signature that your blog author always adds at the end of their blog post. This could be their name, a sign-off slogan, etc.
5. Now click Save to finish the setup of your Blog Author. You are all done! Now get out there and post to your blog! Learn more how to post to your blog below.
Blog Authors General Information
| *Name | The first field is for the first name and the second field on the right is for the last name of your blog author. |
|---|---|
| Put the email address of your blog author here. Email notifications will go to the author of the post. | |
| Icon | Add an image that is 48 pixels high x 48 pixels wide, this will be the public image avatar for your blog authors. This will appear to your customers reading the blog posts. |
| Bio | Write in a brief biography explaining some details about your authors. This helps connect your readers to the author. |
| Is Active | This (yes/no) toggle is designed to allow you to choose if the blog author can or cannot be added as the author for new blog posts. |
| Is Component | This (yes/no) toggle is intended to control if you want to make this author a component. If you make an author a component, you can add the component to any page and it will display just this one blog author's posts to that page. |
*Required Fields
Blog Categories
The Blog Categories tab allows you to setup custom blog categories to separate your blog posts.
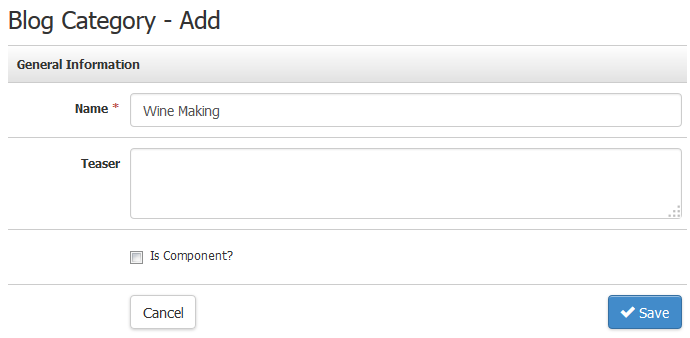
To add a category first select Blog Categories from the Blog drop down menu. Next click “Add a Blog Category”. The only information you will need to enter is the title of the category, for instance Wine Making. After you have created different blog categories and begin to assigning blog posts to them, you will be able to view the number blog posts assigned to each category.
1. Navigate to the Content Editor section > Blog subsection > Click Manage Blog Categories.
2. Click the Add a Blog Category button.
3. General Information: In this section, you will add the name of the Blog Category and the teaser. By checking "Is Component" you can also control if you want this to be a component to add to your website later.
4. Description: Now you can add a description to the Blog Category, this is designed to be a brief descriptor for those who view the categories. This depends on the setup and design of your blog layout.
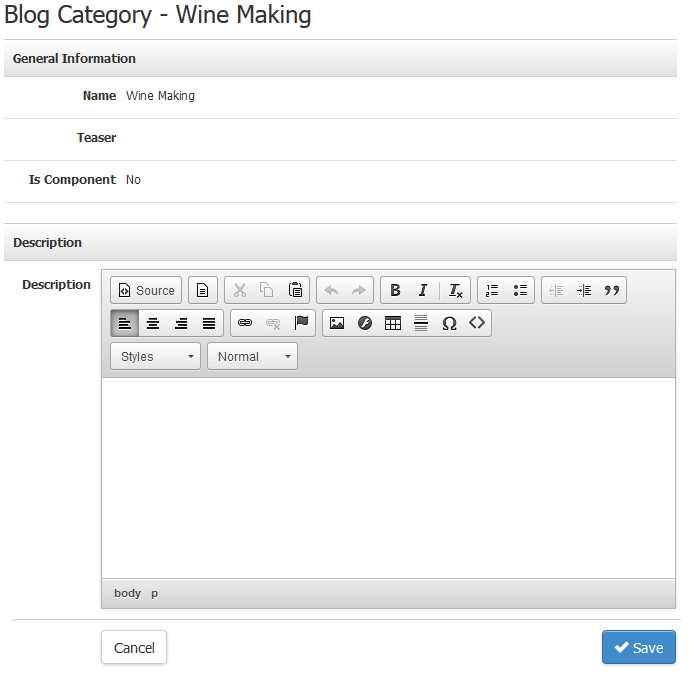
5. When you are ready to finish the Blog Category press Save.
Blog Categories General Information
| *Name | This is the name of the Blog Category. This is public for your viewers and readers. |
|---|---|
| Teaser | This is a brief piece of information to pique the interest of your readers. |
| In Component | This toggle allows you to control if this category can be added to any page on your website. If it gets added, it will automatically pull in all blog posts assigned to this category. |
*Required Fields
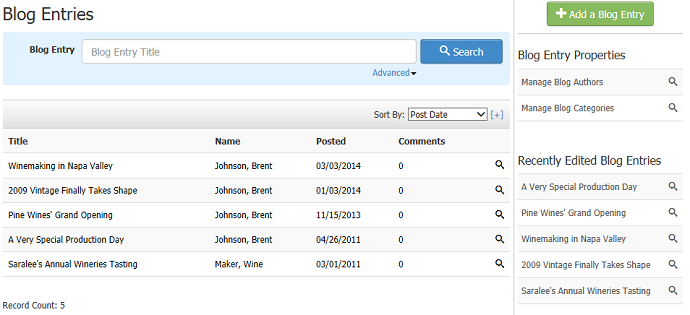
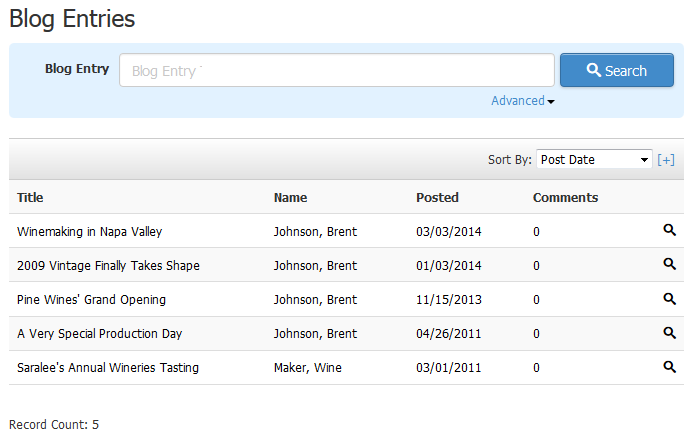
The Blog Entries tab allows you to create and edit blog posts. This will be the default landing page when clicking the blog tab. You will also be able to view past blog posts using the search feature.
1. Navigate to the Content Editor section > Blog subsection > Click Manage Blog Entries.
2. Click the Add a Blog Entry button.
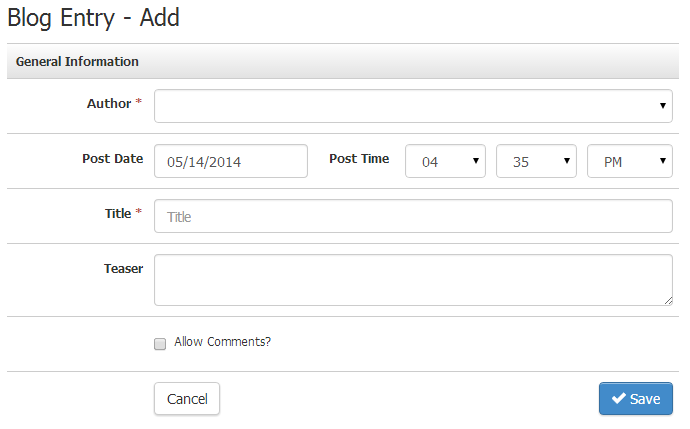
3. General Information: To start out you post you will want to select your blog author. Next you will set the Post Date & Time. The post will not become visible on the website until the set Post Date & Time. Blog can be postdated to a future date. This would allow you, for example, to sit a write multiple blog posts at once time but set them to post in monthly intervals. Next title your blog post. You can add teaser information to give readers a taste of what your blog post contains before they navigate to your actual post. Checking the Allow Comments box will allow readers to comment on your blog post.
4. Description: This is where you will enter the content of your blog post. It works the same way as content entry on your General Pages. Components such as forms and polls can be added to your blog posts, allowing for greater feedback and interaction with your readers.

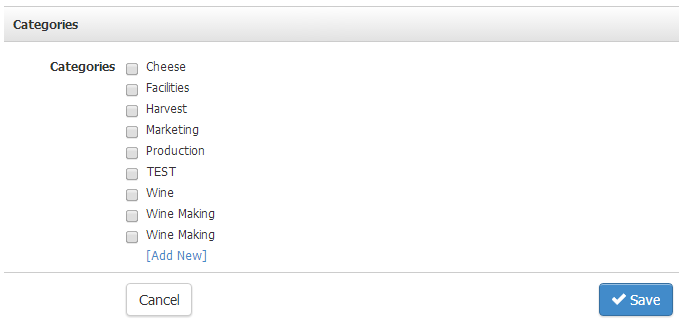
Categories: Here you can assign your blog posts to custom categories that you setup. A blog can be assigned to multiple categories. Simply check off the categories you would like your blog post to be a part of.
5. Marketing: The marketing tab is where you will find the Marketing URL for the specific blog post. You can use this to direct readers right to the blog post page. For example you could send newsletter subscribers an email with a link to a specific blog page.
6. Comments: From the comments tab you can moderate and remove inappropriate blog posts that have been made on a blog post.
Blog Entries General Information
| *Author | In this mandatory field, select from a drop down of the Blog Authors you have previously created. |
|---|---|
| Post Date | Date in MM/DD/YYYY Format for North America. |
| Post Time | Add in the Hour, minute and choice from AM or PM. |
| *Title | In this mandatory field, Add the title you want your customers to read. |
| Teaser | The teaser is designed to catch the attention and wet the appetite of your reader so that they read the entire post. |
*Required Fields
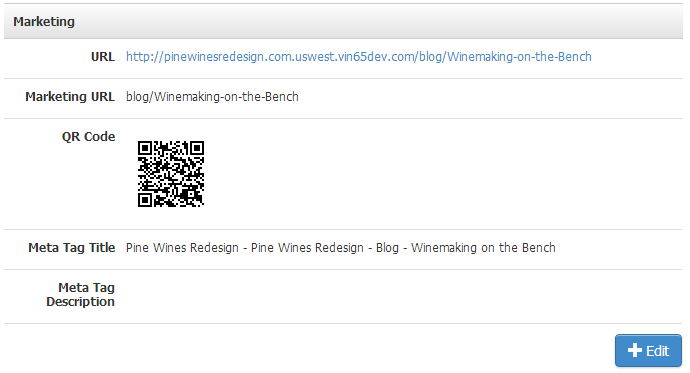
Marketing
| URL | This is the full website address that you will be used if someone wants to access this page directly. This updates when you change the Marketing URL. |
|---|---|
| Marketing URL | This is the Marketing URL, the shorter easier to manage URL designed for marketing campaigns. |
| QR Code | This Quick Reference code is able to be clicked on when you are editing this section to display a larger higher quality QR code for saving and distributing. This changes each time the Marketing URL changes. |
| Meta Tag Title | The Meta Tag Title is a title that displays the first few details on Search Engines. |
| Meta Tag Description | This section allows you to put a paragraph that displays on most Search Engine results. |
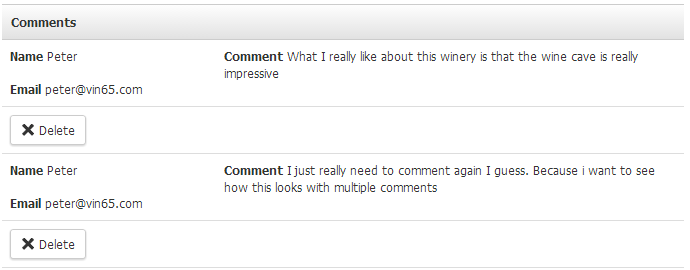
Comments
| Name | The name of the person commenting on your Blog Post. This may be a fake name. |
|---|---|
| The email address of the person that commented on your Blog Post. This could be a fake email address. | |
| Comment | The comment they made on your website. |
| Delete | To delete a comment on a blog post, you will need to click the Delete button shown below. |
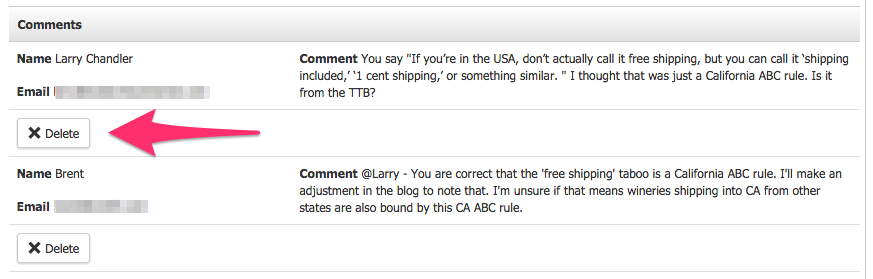
Deleting comments is not recommended to be good blog etiquette unless the blog comment is confirmed to be spam. Unfortunately because we go the extra mile and use CAPTCHA files on blog posts, real people (not robots) may be able to still post spam on your blog comments and you will want to make sure you check your posts often to delete the spam posts.
To privately respond to blog comments, the fastest way is to do this externally of Vin65. In the comments area of your blog post you can find their comments and their email address that they provided on the comment form. You can email them directly from your own email inbox.
Delete A Blog Post
1. To delete a blog post simply navigate to Content Editor > Blog
2. From the list of Blog Entries, click the blog you would like to delete.
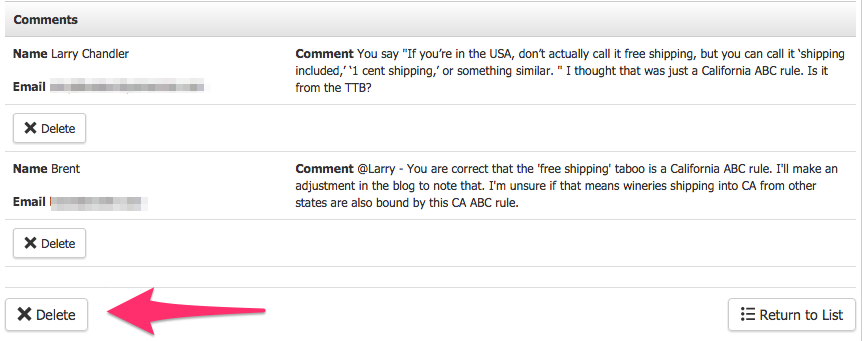
3. Scroll to the very bottom of the blog post and click on Delete (shown below). Note that the larger delete button is for the blog post, not to be confused with the smaller delete button that is for deleting comments.
When clients first start using the blog feature, or when they are considering
adding it to their website, many wonder:
“How often do I need to write a blog post?”
If you’re looking for a easy answer or “magic number” as to how often you should write a blog post, unfortunately there isn’t one. What is recommended is that you find out what works best for your business, posting as often as possible, while maintaining consistency. At least once a week would be best otherwise biweekly works as well. The bare minimum would be once a month. Remember you want to frequently add fresh content on your site, giving your customers a reason to frequent your site. When establishing your businesses “Blog Plan” consider the following factors:
- Resources: When considering how often you should write a post, it’s best to consider your resources. How many authors will be posting? Will I be the only one writing? How much time can I devote to blog posts without neglecting other necessary tasks? It is best to write as often as possible, once or twice a week if possible. Try to decide on a day and schedule it each week specifically for your blog posts. Note: The Vin65 platform allows you to postdate your blog posts allowing you to write a number of posts and post date each. Though you may write a number of posts at once remember to stick to your posting schedule.
- Quality Content: While it is recommended to post often, do not sacrifice Quantity for Quality. No one likes to read a slapped together post that offers little more than a distraction from more important tasks. Tailor your content to your customers. Remember you want your blog to offer your customers something they can’t get from your competitors, a personal touch from you. Make sure that each blog post is meaningful and informative to customers. Make sure your posts reflect your brand. For example: if part of your winery experience is the love of wine and food, why not highlight this with featured recipe posts, or perhaps entertaining tips. Are you passionate about wine making? Why not use a blog posts to inform and educate customers about how great wine is made. Your blog allows you to showcase the fact you know your industry as well as bring your brand personality and passion to your customers.
- Consider Your Audience: Who is your target market? Are you trying to reach out to a younger more social audience? As consumers become more social minded they will come to expect to hear from you more often. By creating regular features on different topics you create a reader base that looks forward with anticipation for your next blog post.
Whatever you blog plan turns out to be, stay consistent. For example if you regularly post on Tuesday and Thursday, make sure that you keep to these deadlines. You can always adjust your posting schedule as needed, but try to post often.
Additional Advantages:
- Blog posts will help to boost your Search Engine Optimization (SEO). Search engines like Google love blog posts. It’s a great way to add new content to your website, increasing the likelihood that Google and other search engines will crawl your site. For more information on SEO please see the Search Engine Optimization (SEO) Documentation.